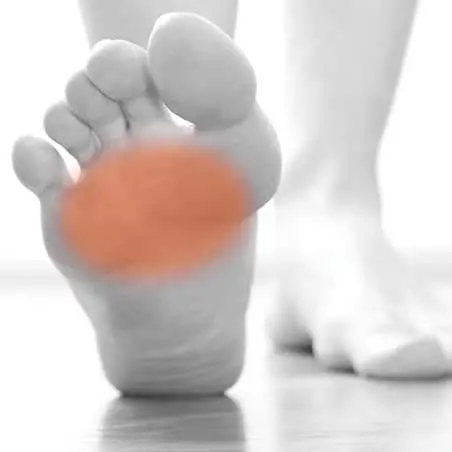
Do you have pain under the ball of your foot? Does it feel like there is a pebble in your shoe that doesn’t go away? You may have Metatarsalgia. This is a painful condition that can effect many different demographics and is frustrating to work on at home.
What is Metatarsalgia?
Pain under the ball of the foot or distal heads of the metatarsal bones, usually in the 2nd and 3rd toes is called Metatarsalgia. Metatarsalgia itself is a term for most types of pain from various injuries to the metatarsal heads. Metatarsalgia is a fairly common condition; and often affects those that run, jump, or have a sudden increase in activity levels. It is more common in women that wear high heels.
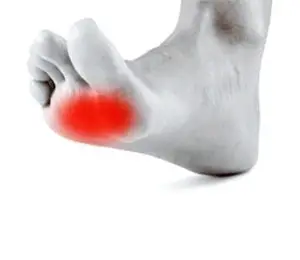 Pain under the ball of the foot can limit activities such as walking, standing, and going up and down stairs. There many different ways to treat Metatarsalgia including modification in footwear, exercise, pain mitigation techniques, and in severe and anatomic abnormalities, surgery.
Symptoms of Metatarsalgia include pain and tenderness under the ball of the foot, most commonly under the 2nd and 3rd toes. The pain may worsen with standing, running, or coming up onto your toes. There may also be an accompanying numbness or tingling in the toes. Some patients also complain of the feeling that a pebble is under the ball of the foot. In short, it’s an irritation and inflammation of the joint where your toes start.
What Causes Metatarsalgia?
The causes of Metatarsalgia are often multifactorial and not usually caused by one single factor. Some of the most common causes are:
Increase in activity or training
- This may occur without you realizing it. Any sudden change in mileage with running, or overactivity with hiking may cause pain the all of the foot. Runners are particularly at risk of developing Metatarsalgia, especially with the recent increasing trend in barefoot running. In the foot, the metatarsal heads receive the largest amount of force. These peak vertical forces can get as high as 275% of someone’s body weight during running (1). Barefoot running or minimalist shoes aren’t inherently bad, but transferring to minimalist running too quickly may leave you at risk.
Anatomical Foot Abnormalities
- As we age our foot alignment may slowly change causing changes in the amount of loading on the Metatarsal heads. Bunions, Hallux Valgus, and tarsal shifts from Rheumatoid Arthritis may leave you at a higher risk.
Poor-fitting shoes or Poor Shoe Choice During Activity
- Wearing smaller shoes and shoes with an elevated heel changes the loading zone to the ball of the foot. High heels tend to focus the load right on the metatarsal heads. If you are having pain in the foot try to avoid high heels and flip flop sandals. It has been reported as high as 30-40% of women will experience a mild case of metatarsalgia due to wearing high heels.
Increased Weight or Obesity
- As mentioned above, the amount of force that is transferred to the ball of the foot during walking and running is quite large. Any extra poundage increases that force exponentially.
Neuroma
- A neuroma is a fibrous growth around a nerve in the foot, usually between the metatarsals heads of the 3rd and 4th toes. This can be painful with pinching the area and can add to the amount of inflammation in the forefoot. This may also alter loading mechanics and increase loading in the 1st and 2nd toes.
Forefoot Fractures or Injury
- Any sort of injury in the foot will alter the foot mechanics. As similar to the neuroma, any injury causes a shift in weight to the inside of the foot, and the 1st and 2nd digits may increase your risk of Metatarsalgia.
What is the Expected Recovery Time for Metatarsalgia?
Most of the time Metatars algia will resolve with home treatment within 6 weeks IF treated properly. Most can expect a decrease in pain with changes in footwear, use of an offloading pad, and a reduction in activity within 1-2 weeks. Return to light activity may be possible within 3-4 weeks but should not be started if there remains pain with walking. By week 6 most people are able to return to their prior levels of activity. See below for the best way to treat Metatarsalgia at home.
The Best Metatarsalgia Treatment for Home
Metatarsalgia Phase 1: Control the Pain and Inflammation
Most commonly 0 – 10 days from injury
R.I.C.E
- Rest the foot and offload the ball of the foot
- Ice the metatarsal head to decrease pain and inflammation within the small joint. The use of an ice cup can protect your hands
- Compression: A little extra support without too much compression can help decrease pain levels
- Elevate the foot to help decrease inflammation. Lay on the floor with your feet on the wall to have gravity help with swelling management.
Offloading the foot
Metatarsal pads:
A simple and inexpensive pad that is placed on the foot to change the area of force on the bottom of the foot. Why does a metatarsal pad help? It changes the primary area of force from the metatarsal phalangeal joint and disperses it to other areas of the foot.
Metatarsal Pad Placement:
1.) Take Out Your Shoe Liner
The easiest way to place your metatarsal pad is to place it out the shoe liner. First, pull the liner out of your shoes.
2.) Locate Where The Ball of the Foot Would Sit
To find the area where the ball of the foot would sit is fairly easy in a pair of shoes that are older as the area will be worn and depressed already. If your shoe is newer simply place your foot on the insole liner and mark the position of the ball of your foot.
3.) Place the Pad on the Insole Liner
Place your pad just behind the area where the ball of your foot contacts the liner. The pad should be ideally placed near the center of the insole and not too far either direction.
4.) Put the Insole Back into the Shoe and Try it out
Once you have your shoes on, you will notice the pad pushing into the sole of your foot just behind the ball. Initially it may feel weird to have the pad in the shoe but for the most part should be feel good. If it doesn’t feel right, repeat the process but move the pad. Most the pads can be moved a couple times.
Metatarsalgia Insole Reviews
With over 563 reviews on Amazon this is one of the most popular options. Comes with built-in metatarsal support to spread and cushion the metatarsal heads to help alleviate pain. No trimming needed, antimicrobial fabric, arch support, and deep heel position.
Metatarsalgia Phase 2: Slow Return to Normal Activities: 10-28 days from injury
One of the best ways to decrease pain at this phase is to begin a stretching routine. Here are the some of the best stretches for Metatarsalgia.
Plantar Fascia Stretch
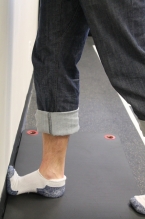
Calf Stretch
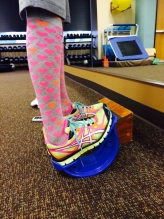
Great Toe Mobility
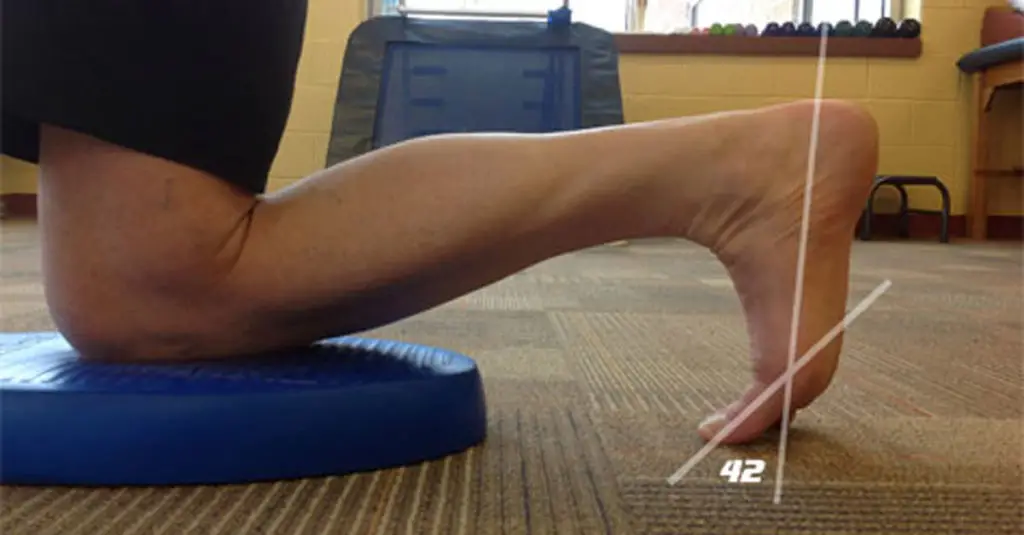
The other goals of phase 2 in addition to beginning stretching are:
- Walking without pain
- Slowly begin to wear other types of footwear as long as its pain free but continue to hold off wearing high heels for now
- Foot Intrinsic Strengthening-
- Strengthen the intrinsic foot muscles
- Towel scrunches


Metatarsalgia Phase 3: Strengthening and Loading phase 28 -60 days
Eccentric Strengthening
- Start with both feet on the edge of s step and hold a ball between your ankles. Hold an appropriate amount of weight in both hands to make it challenges. Go up onto your toes quickly and then slowly lower yourself back down over a count of 5 seconds while maintaining the ball between the ankles.
Running
- Start at walking 30 seconds and jogging 30 seconds, or a 1:1 ratio of walking to jogging. If this remains pain free for the first week then slowly begin to increase the amount of time jogging and decrease the time walking.
Jumping
- Jumping is a great way to maintain leg strength and functional ability. It is really important to try and land softly and with equal weight bearing so it might be best to do in front of a mirror to look at your body position during landing.
Plyometrics
- It’s time to progressively load the front of the foot. You want to incorporate jumping and landing softly, controlling your body through out the whole motion. This should remain pain free. Really emphasize exploding off the the foot when taking off.


In Review
Metatarsalgia can be a frustrating and lingering issue that is best taken care of quickly instead of letting it hang around and get worse. With the use of pain management, insoles, and then targeted strengthening exercises you can help treat metatarsalgia at home.
Works Cited:
Safran MR, McKeag DB, Van Camp SP, eds. The foot: endurance events, marathon. Manual of Sports Medicine. Philadelphia, Pa: Lippincott-Raven; 1998. 485, 558-9.
Other Great Rehab Related Articles
Dealing with Painful Stairs After Ankle Replacement Surgery
Walking After a Total Ankle Replacement: Tips for a Successful Recovery
Exercises While Non-Weight Bearing After Ankle Replacement: Elevation, AROM, Leg Raises, and More
Ankle Pain with Stairs: Causes and Home Treatment Options
5 Common Mistakes You’re Making After an Ankle Sprain
6 Great Ways to Reduce Low Back Pain with Driving
Disclaimer: The information provided in this post is for educational purposes only. This is not a substitute for a medical appointment. Please refer to your physician before starting any exercise program.
